Frequently Asked Questions
HDDs are electro-mechanical storage devices (they have moving pieces as well as electronics) whereas SSDs are purely electronic (no moving pieces). This distinction allows SSDs to transfer data at greater speeds and also makes SSDs much more shock tolerant than HDDs. However, SSDs are more expensive.
If you are recording for archival purposes then recording directly to HDDs is affordable, compact means of storage. Each 1TB drive can store over 20 hours of ProRes LT footage (over 9 hours of ProRes HQ). If your workflow allows you to edit as you go then SSDs, with their greater data transfer rate, make loading and editing your footage more efficient and thus a more streamlined workflow.
Requirements and Recommendations:
- Form Factor: 2.5"
- Interface: SATA I/II/III
- Height: 9.5mm maximun
- Current: 1200mA maximum
- Sustained Transfer Rate: 27.5MB/s minimum
- HDD Speed: 7200RPM recommended
Failure to meet these requirements may result in jerky playback or dropped frames
Best Practices
- Always use a new drive or a drive with very little use
- Initial drive formatting must be performed using Mac OS X Disk Utilities
- All subsequent formatting should be performed by Ki Pro / Ki Pro Rack
Improper formatting may lead to media mounting issues!
DIDAC Systems is not responsible for damage caused by improper formatting.
If you wish to use a drive that has been previously partitioned or formatted, you must Clean/Delete the existing MBR and Partition Table. See FAQ.
Tools needed:
- computer running OS X 10.7 or higher
- external SATA dock
- new HDD or SSD
Procedure
- Insert drive into the docking station
- Initialize disk, if prompted
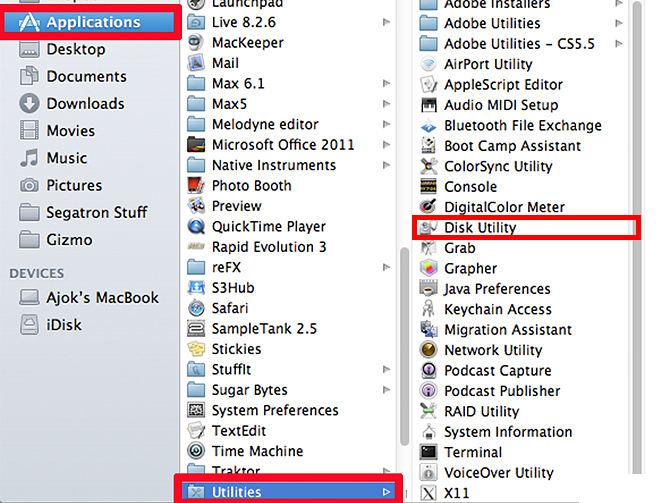
- Open Applications > Utilities > Disk Utility
- Select the appropriate drive in the left column
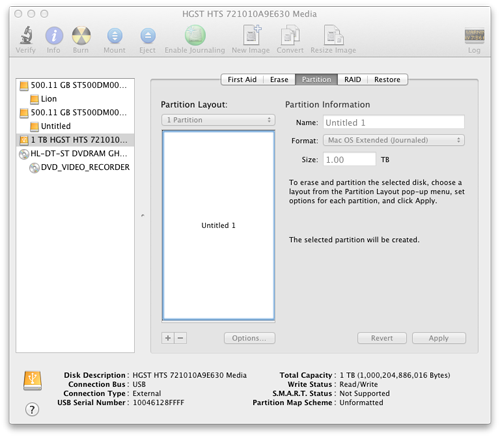
- In the Partitions tab, select the following:
- Partition Number: 1 Partition
- Format: Mac OS Extended*
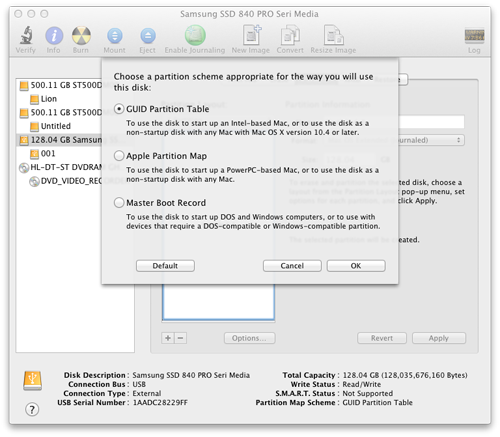
- Verify that GUID Partition Table (GPT) is selected under Options
- Click Apply button
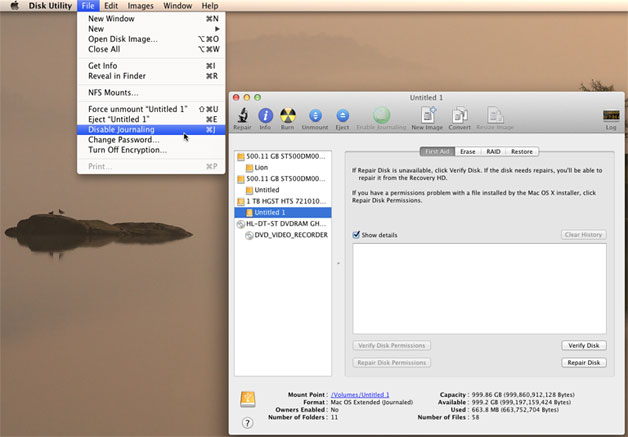
If Mac OS Extended is not an option, then choose Format: Mac OS Extended (Journaled). After the drive is formatted,
- select the volume (under the drive in the left column)
- hold down the ALT / Options key, click File from the menu bar and select Disable Journal
Disclaimer: DIDAC Systems, LLC is not responsible for lost user data. Be sure to back up any important data before proceeding
This process is irreversible and will permanently erase/destroy all data on the selected drive. Please read all steps, instructions, and warnings before attempting.
Please make certain that you are erasing the correct disk. Remove all additional drives from the computer excluding the drive you are booting from and the drive you want to Erase/Clean.
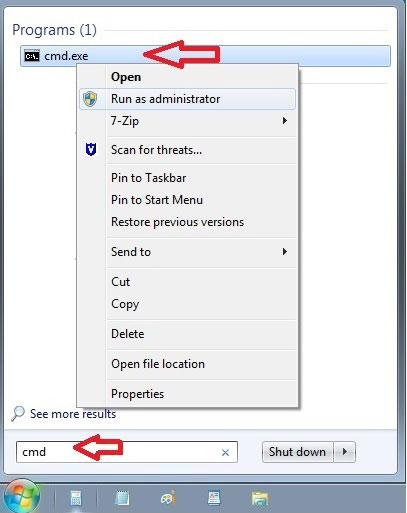
1) Open a Command Prompt window. To open the Command Prompt on a Windows Vista or Windows 7 machine click on Start and type cmd in the search bar. Then right click on cmd.exe and run as administrator. It will prompt you with the message, "Do you want to allow the following program to make changes to this computer," click yes. A black Command Prompt window will open.
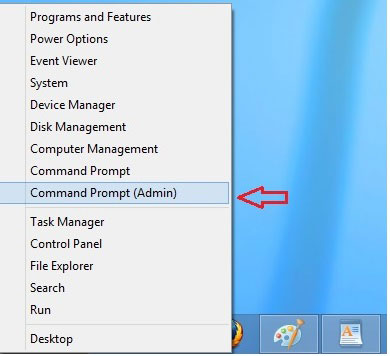
On Windows 8 move your mouse to the bottom left hand corner of the desktop screen and right click. Select Command Prompt (Admin) from the pop-up menu.
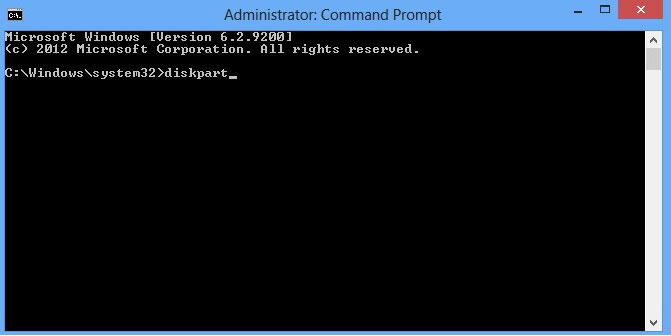
2) From the command prompt, type DISKPART and press Enter.
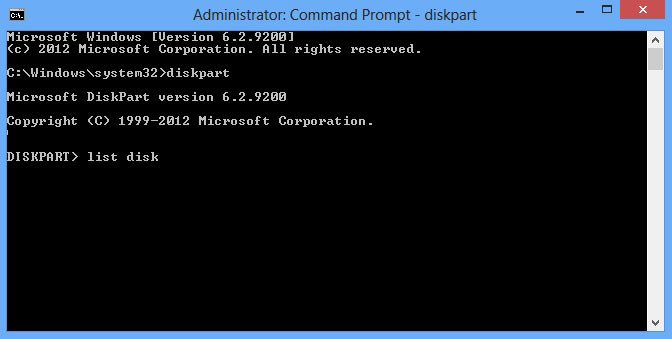
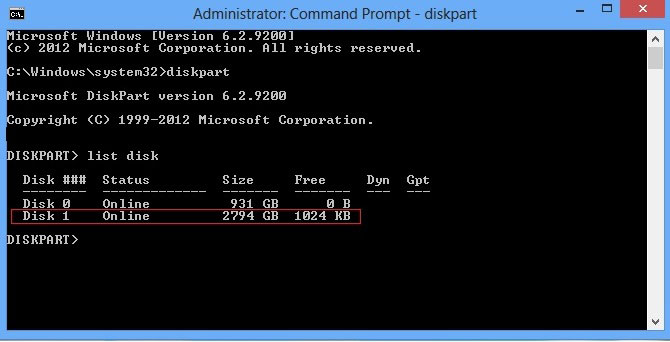
3) From the DISKPART prompt, type LIST DISK and press Enter.
4) A list of disks will appear in a text format. You will return to the DISKPART prompt.
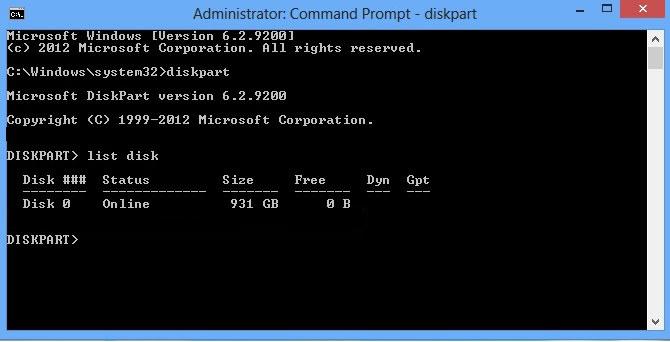
5) Plug in the disk you wish to Erase/Clean, type LIST DISK and press Enter. Note the Disk Number you want to Erase/Clean.
Warning: Diskpart Erase/Clean will permanently erase/destroy all data on the selected drive. Please be certain that you are erasing the correct disk.
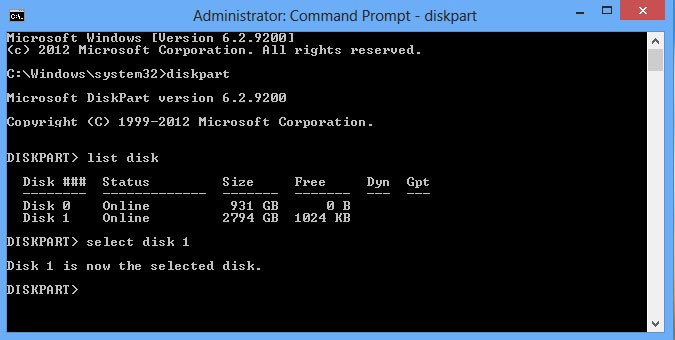
6) From the DISKPART prompt you will need to select a disk number (in our example, you would type SELECT DISK 1) and press Enter.
A message appears verifying the disk is selected. You will return to the DISKPART prompt.
Warning: Diskpart Erase/Clean will permanently erase/destroy all data on the selected drive. Please be certain that you are erasing the correct disk.
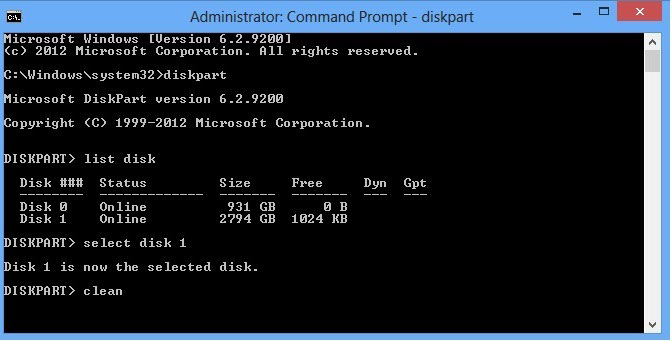
7) From the DISKPART prompt, type CLEAN and press Enter. The drive's MBR, partition, and signature is now removed. You will return to the DISKPART prompt.
Warning: Once you type CLEAN and hit Enter the drive will be erased. No warning will be provided.
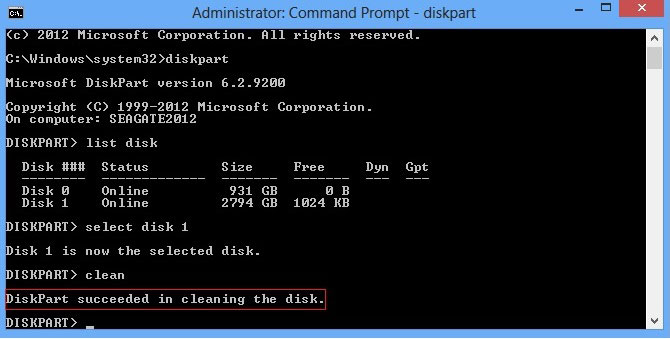
8) A message will indicate the operation completed successfully. Close out of the Command Prompt window by clicking the red X in the upper right hand corner.
1) Open Disk Utility in Finder > Applications > Utility
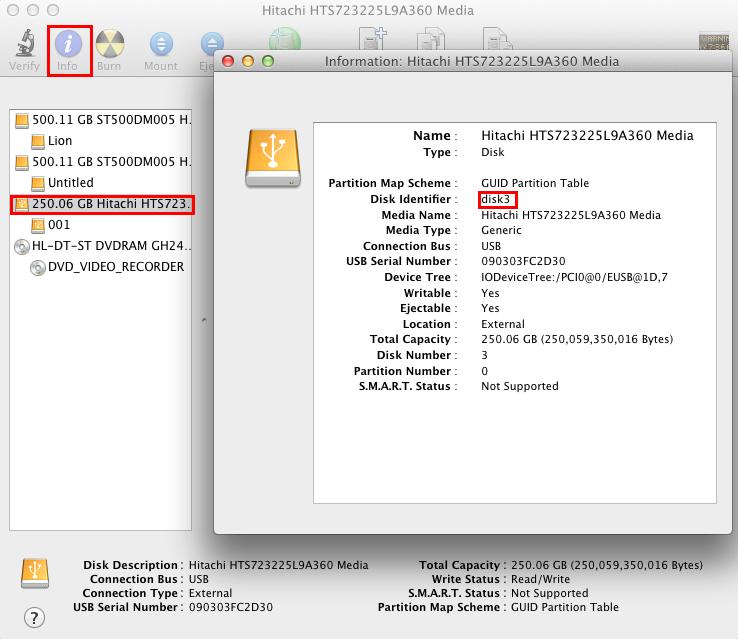
2) Select the disk and click the Info button at the top. Note the Disk Identifier. (In our example, the Disk Identify is disk3)
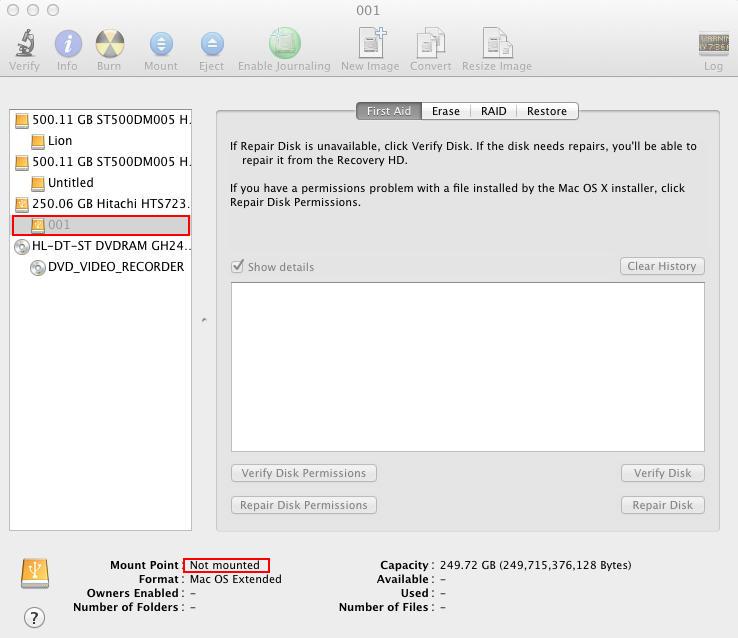
3) Verify there are no mounted volumes. If there are any mounted volumes, select the mounted volume and click Unmount button at the top.
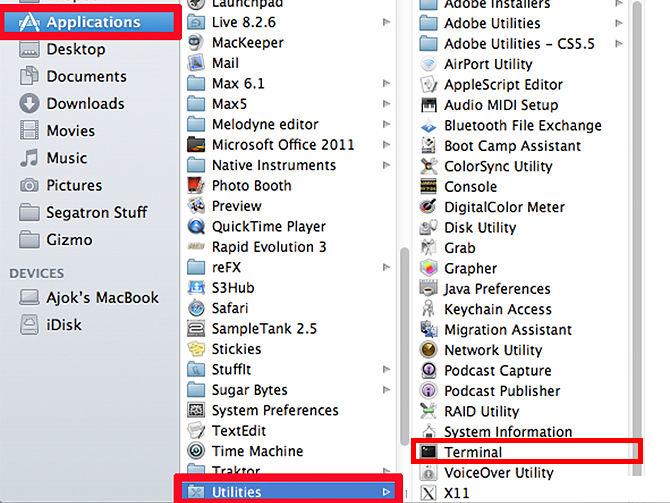
4) Open a Terminal window from Finder > Applications > Utility
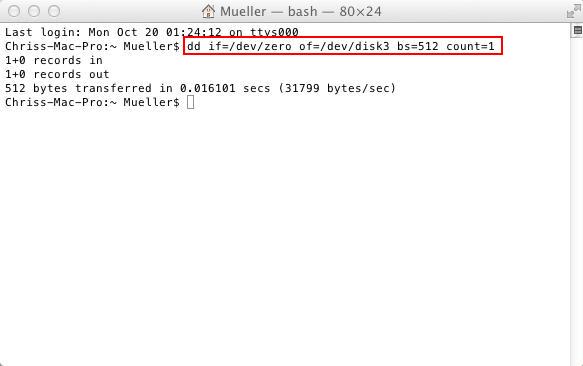
5) In the Terminal window type dd if=/dev/zero of=/dev/**DISK#** bs=512 count=1 where **DISK#** is the Disk Identifier noted above.
Warning: This command will permanently erase/destroy all partitioning information on the selected drive. Please be certain that you are erasing the correct disk.
Warning: Once you hit Enter the drive will be erased. No warning will be provided.
- HDD HGST TravelStar 7K1000 1 TB - tested and verified
- HDD HGST (Hitachi Global Storage Technologies) TravelStar Family
- SSD Samsung 840 Pro 128GB - tested and verified
- SSD Samsung 840 Pro Family utilizing the Samsung MDX controller
- SSD Crucial BX100 250GB - tested and verified
- SSD Crucial BX Family utilizing the Silicon Motion SM2246EN controller
- SSD Samsung 850 Evo 500GB - tested and verified
- SSD Samsung 850 Evo Family utilizing the Samsung MGX controller
- SSD OCZ ARC100 240GB - not recommended - could not format the drive over USB. Known issue.
- SSD any OCZ SSD is currently NOT recommended.
- SSD any SSD that utilizes the Indilinx Barefoot 3 controller is currently NOT recommended.